Infolink

AddToAny

Thursday, May 26, 2016

Brinjal Masala / Baingan Masala - Spicy brinjal curry

Yum
If you are following my blog you may know that I am little bit biased towards Begun (Brinjal) and lau (bottlegourd). Brinjal / Eggplant / Aubergine is called baingan in Hindi and is considered Sabziyon ka Raja. Here is one more brinjal recipe from my kitchen. This is a vegetarian dish and you can make it more strictly vegetarian (Jain food) by removing the onion from the recipe. This yummy spicy dish is very popular in Northern part of India.


Preparation Time: - 15 min

Cooking Time: - 35 min

Servings: - 4 persons

Ingredients:-

  1. 2 medium Brinjal
  2. 1 large sized onion chopped
  3. 2 green chili slited and one more for garnishing. You can use red chili if you like.
  4. 1 large tomato chopped
  5. 1 ½ tbsp Ginger paste
  6. 1 tsp Garlic paste
  7. ½ tsp Turmeric powder
  8. Salt and Sugar to taste
  9. 1 tsp Cumin seeds
  10. 3 tbsp grated Coconut
  11. 7~8 tbsp Vegetable oil. I used Sunflower Oil but you can use any vegetable oil.
  12. 1 tbsp Ghee
  13. 2 tsp Garam Masala
  14. Chopped coriander leaves for garnishing

Preparation:-


  1. Cut the brinjal lengthwise and keep aside.
  2. Chop the onion and tomato. Keep aside.
  3. Take a bowl and mix half of onion and tomato. Add half of ginger and garlic paste, the grated coconut and one green chili. Now add turmeric powder and salt. Mix thoroughly.
  4. Apply this spice mix to the brinjal pieces and marinate for 5 minutes.
  5. Take a non-stick Kadai/wok and heat the oil in high flame. Then turn the heat to medium flame and put the cumin seeds and one green chili.
  6. When the cumin seeds splutter add the remaining onion.
  7. When the onion pieces turn golden brown add remaining ginger and garlic paste.
  8. Sauté for 1 min and add remaining tomato.
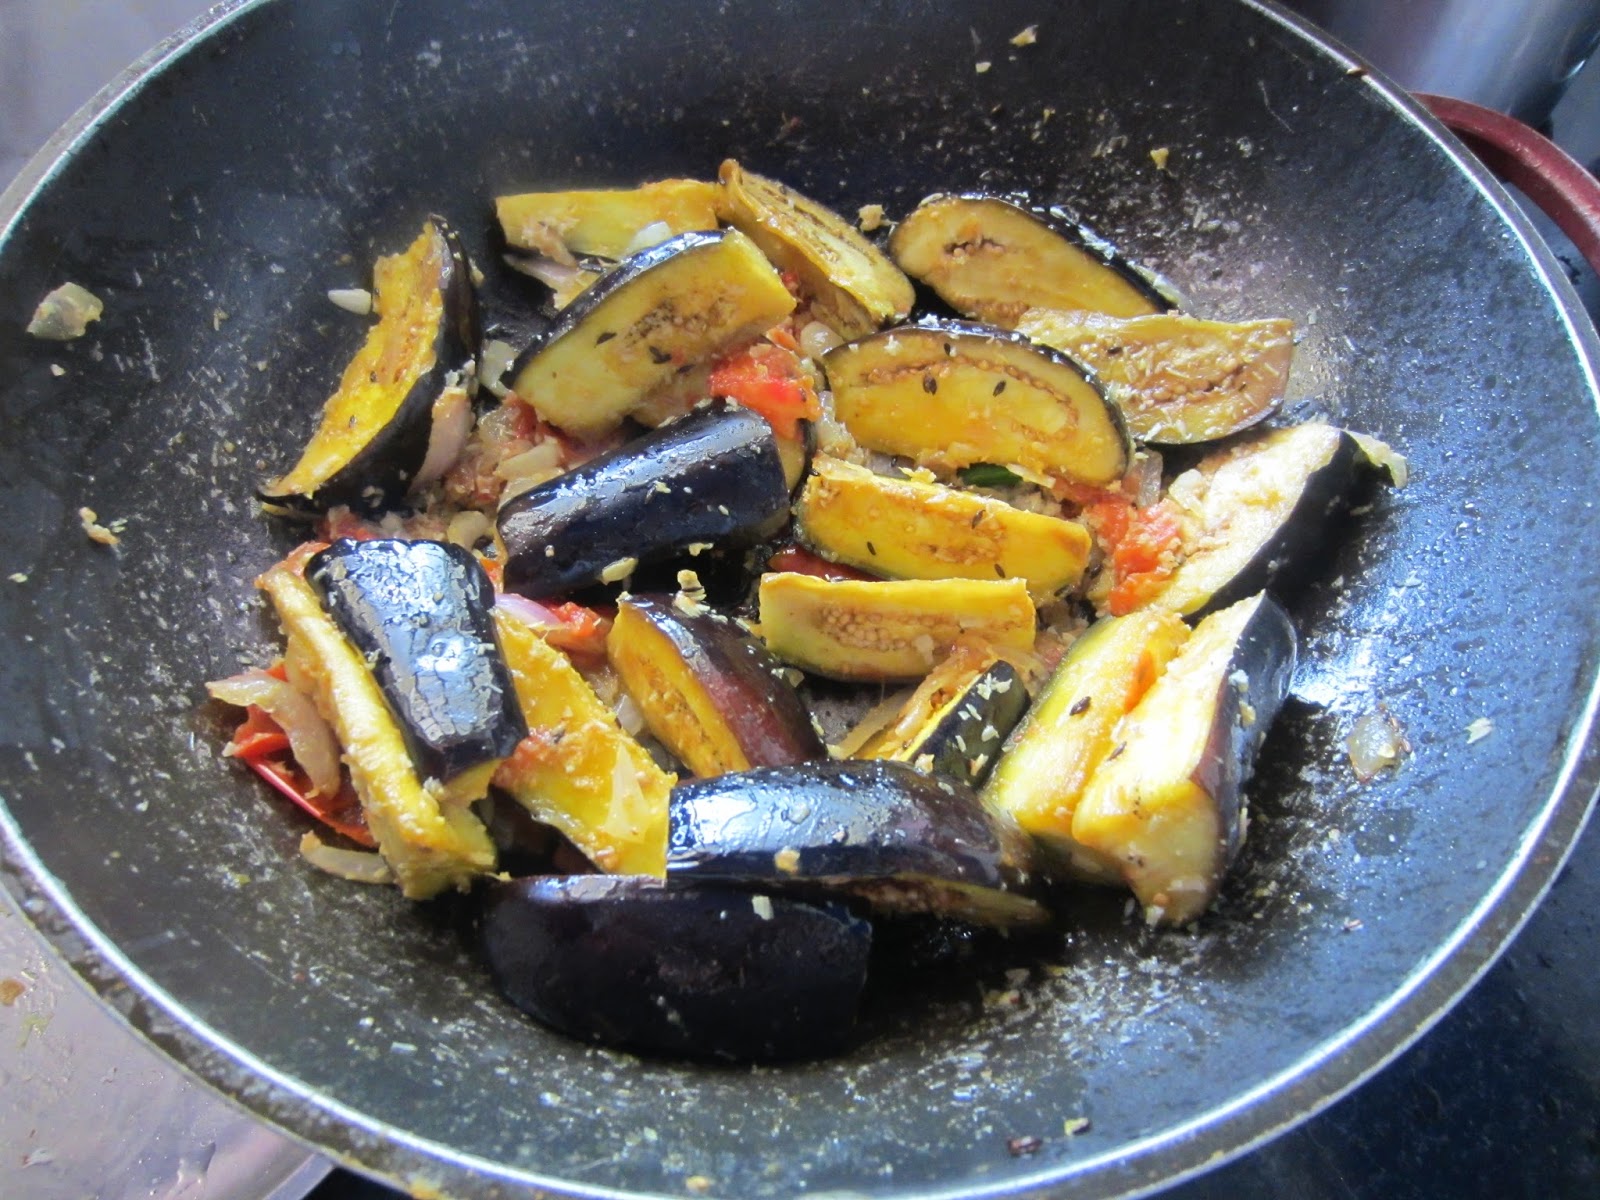
  9. Stir to mix properly and now pour the marinated brinjal pieces one by one.
  10. Stir continuously and after about 1 minute add grated coconut.
  11. Brinjal and tomatoes will release lot of juice. Cook on low flame till the juices dried up.
  12. Now add a little bit of water and put the lid to boil the whole preparation.
  13. Check continuously and when one side of the brinjal is done turn them upside down.
  14. You may need to add some water here if the things are dried up. Wait till both the sides are boiled properly.
  15. Add Ghee and garam masala. Mix it well. This will enhance the aroma of the preparation. Sauté for one minute and switch off the burner.
  16. Now the dish is ready. The final dish should look moist but with no extra juice. Garnish with a green chili and coriander leaves.
This is a North Indian side dish which goes well with hot rice, roti or paratha.

As always please feel free to comment, criticize and seek if any help is required. I am all ears.

Monday, May 16, 2016

Potol / Parwal dum - A delicious Vegan Pointed Gourd Curry

Yum
Summer has come and Parwal/ Parval/ Patal started appearing in the market. I was contemplating to cook some side dish for my blog but never thought of what happened next. I was preparing for Alur dum, a traditional Bengali side dish but when the masala was ready I found with disdain that most of the potatoes are rotten. I was angry with my husband for irresponsibly selecting the potatoes but he was in office and I have to cook for the day. I had some Parwal in my refrigerator and thought of cooking potoler dum with them. The preparation turned out to be yummy and I decided to present the same in my blog. Here it is:-

Preparation Time: - 10 min


Cooking Time: - 35~40 min


Servings: - 2~3 persons

Ingredients:-

  1. 8 pieces of Parwal
  2. 2 Bay leaves
  3. 1 star Anise (optional)
  4. 2 medium sized Tomato
  5. 1 ½ tsp Cumin seeds
  6. ½ tsp Asafetida (Hing)
  7. 1 tsp Kasmiri Red Chilli (You can have more according to your taste)
  8. ¼ cup curd/ yogurt
  9. 1 ½ tbsp ginger paste. You can smash ginger or can use the paste available in market.
  10. ½ tsp Turmeric powder
  11. 1 tsp coriander powder
  12. ½ tsp Bhaja Masala
  13. 2 green chili slit horizontally
  14. Sugar and salt to taste
  15. 7~8 tbsp mustard + vegetable oil ( If you want to cook the authentic Bengali way then use Mustard oil but you can use any vegetable oil also)
  16. 2 tsp Garam Masala
  17. 2 ½ tsp Ghee

Preparation:- 

  1. Peel the Patal as shown in the picture and keep aside.
  2. In a bowl make a paste of Curd/Yogurt with coriander powder, little bit of sugar and bhaja masala. Beat it nicely. Keep aside.
  3. Heat 5 tbsp oil ( 1:1 mustard oil and sunflower oil) in non-stick kadai and shallow fry the Parwal with Kashmiri red mirch powder, salt. Keep aside.
  4. Pour the rest of oil in same proportion in the same kadai and heat it in high flame.
  5. Now add bay leaves, green chili, Anise, Asafetida and cumin seeds.
  6. When the cumin seeds splutter add ginger paste, tomatoes, salt and turmeric powder. Sauté for sometime.
  7. Add the shallow fried Parwal and stir for a minute or so.
  8. Pour the curd mixture and continue cooking. When the oil starts separating from the mixture and the whole thing becomes dry add about ½ cup of water.
  9. Cover the kadai and continue cooking for about 10 min. Intermittently remove the cover and stir so that it does not get sticky in the bottom.
  10. Check if the parwal is cooked fully when the gravy becomes thick.
  11. If not, you may need to sprinkle little bit of water until it is done.
  12. Add the ghee and garam masala, sauté for 1 min and switch off the flame.
Now this mouth watering dish is ready. Garnish with coriander leaves and green chili.

This one is a side dish for rice as well as Roti / Paratha.

As always please feel free to comment, criticize and seek if any help is required. I am all ears.

Friday, May 13, 2016

Banana Milkshake - A nutritious kid's breakfast option

Yum
Today we are going to have a nutritious, filling, refreshing banana beverage. This is a great summer drink and a good kid’s breakfast option too. Some of the benefits of Banana as a fruit are described below. For details you can refer to http://foodmatters.tv/articles-1/25-powerful-reasons-to-eat-bananas

100 grams banana contains 0.3 gm total fat, zero cholesterol, 1 mg salt, about 360 mg potassium, 2.6 gm dietary fiber, 12 gm sugar and 1.1 gm protein. This result in following benefits:-

1. High Fiber Content
2. Lowers Heart attack risk
3. Ease in Digestion
4. Powerhouse of Nutrients
5. High Source of Potassium
6. Blood Pressure reducing
7. Helps fight Anaemia due to iron content

Preparation Time: - 10 min

Cooking Time: - 5 min

Servings: - 2 persons

Ingredients:-

  1. 2 pieces ripe banana – I prefer bigger Robusta type but you can use smaller type Yalakki banana also. 
  2. 1 ½ cup or approx 350 ml full cream milk. If you want a totally Vegan preparation you can use even Soya or Almond Milk. That way it would be casein free too. I used full cream milk as I want it to be a kid’s breakfast powerhouse.
  3. 2~3 tbsp of Peanut butter (optional – it can be used as a thickening agent for dairy-free option as above).
  4. 1 big scoop of Vanilla Ice Cream
  5. Nutmeg powder – I grounded ¼th Nutmeg in pestle and mortar
  6. Sugar or Honey or Jaggery or any sweetening agent you like. You may use Mapple Syrup if you want it totally sugar free. I personally used 4 tbsp of Honey
  7. 1 tsp Rose water
  8. 5~6 ice cubes

Preparation:-

  1. Boil Milk and keep aside to cool down.
  2. Peel the banana and cut into small pieces. Keep aside.
  3. Crush the Nutmeg to make a fine powder and keep aside.
  4. Pour the milk, banana, honey, nutmeg powder and Vanilla Ice Cream together in a blender. Blend for 1 minute.
  5. Add the Ice cubes and Rose water – mix again in blender for 15 seconds.
  6. Optionally garnish the drink with a cherry and a layer of honey.

Refrigerate and serve chilled. Your kids will love it and your spouse may fight for his/her share with them.

As always please feel free to comment, criticize and seek if any help is required. I am all ears.

Monday, May 9, 2016

Mackarel curry with coconut

Yum


One of my Malayali (from Kerala) friends suggested this recipe. I have made few changes to suit my style. You can use any fish to prepare this dish but I feel Mackarel (Bangada in local language) or Sardine is best suited for it. Sea fish has a whole range of health benefits. Packed with omega-3 fatty acids, Vitamin E and high amount of proteins, sea fish should find a regular place in your weekly diet. This wonderful recipe is as follows:-

Preparation Time: - 15 min

Cooking Time: - 25 min

Servings: - 2 persons


Ingredients:- 

  1. 4 pieces of Mackerel Fish
  2. ¼ of a Coconut grated
  3. 1 tsp Cumin / Jeera powder
  4. 3~4 cloves of Garlic
  5. 1 ½ tsp Black Pepper powder or you can use 4 pods of whole black pepper
  6. 1 tsp coriander powder
  7. 1 tsp red chili powder ( I used Kashmiri Mirch). You can use more if your taste permits so.
  8. 1 tsp turmeric powder
  9. 4 tsp tamarind paste or you can make a paste from tamarind pulp
  10. Onions to make 4 tsp onion paste
  11. 2 tsp ginger paste – you can use readymade ones or can prepare yourself by grinding
  12. 2 tsp garam masala
  13. 3 tbsp Olive oil / Vegetable oil / Coconut oil. Originally this recipe was suggested with coconut oil but I used olive oil to reduce the cholesterol content.
  14. Salt and sugar to taste.
  15. 1 green chilies silted for garnishing

Preparation:- 

  1. Wash and dry fish well. Rub all over with turmeric powder and salt. Keep aside. 
  2. Now smash the ginger and onion in a pestle and mortar to make a paste. Keep aside.
  3. Mix grated coconut, cumin powder, garlic, black pepper, coriander powder, red chili powder and ½ tsp turmeric powder.  Blend all of them with a little water in a mixer-grinder for 1 min.
  4. Take a heavy bottom wok/ kadai and pour the mixture alongwith tamarind paste, salt and sugar. Add the fish and sufficient water so that the level is just above the fish.
  5. Cover and cook for 10 min in medium flame.
  6. Add the ginger onion paste and stir with caution so that fish pieces do not brake.
  7. Add the oil. Cook for another 2~3 min.
  8. Add garam masala and cook for a minute or so. Now switch off the flame and garnish with the silted green chili.

Please note it is not yet ready to serve. If you cover and wait for some time the tamarind paste will be absorbed inside the fish properly. This will make it tastier. You can also add coriander / dhania leaves for garnishing. This is one item to be eaten with rice.

As always please feel free to comment, criticize and seek if any help is required. I am all ears.


Friday, May 6, 2016

Chal diye lau ghonto - Bottle gourd curry with rice

Yum


I like bottle gourd or lauki specifically as it has many health benefits and it is especially good during hot summer. 

Following are the health benefits of bottle gourd. For more details you can refer to http://conscioushealth.net/10-health-benefits-of-bottle-gourd-or-lauki-conscious-health-nahid-ameen/


  1. Fiber -rich
  2. Helps sleeping disorder
  3. Healthy heart
  4. Prevention of hair graying
  5. Dandruff treatment
  6. Stress reduction
  7. Reduction of blood pressure.
This authentic Bengali preparation of yesteryear is one of my favorite. But it takes a lot of time to cook this yummy dish – so better to try on weekends.

Without wasting much words or time here it is:-

Preparation Time: - 20 min

Cooking Time: - 40 min

Servings: - 3~4 persons

Ingredients:-

  1. 1 medium Bottle gourd
  2. 2 big Potatos
  3. 1/3 cup or about 75 gm Jeera rice ( If you get Gobindobhog rice it is better but it is difficult to get that in Bangalore )
  4. 1 inch cinnamon stick cut into 4 pieces
  5. 2 tbsp Ginger paste  ( I made the paste from real ginger)
  6. 2 tsp Cumin seeds
  7. 3 silted green chili (1 for garnish and 2 for cooking)
  8. 1 tsp Turmeric Powder
  9. 2 Bay leaves ( The photos did not have them as when I was preparing I ran out of it )
  10. 1 tsp Kashmiri red chili powder ( you may want it more )
  11. 1/3 cup curd
  12. 2 tsp Garam masala
  13. 1 tsp Cumin/ Jeera powder
  14. 8~9 tbsp Mustard Oil (Since it is a authentic Bengali dish mustard oil should be used but most of the time I use a 1:1 mixture of mustard and sunflower oil)
  15. 1 tbsp Ghee
  16. Salt and Sugar to taste
  17. Handful of raisins
  18. Handful of peas (optional – may be in winter when fresh peas are available)

Preparation:-

  1. Peel and chop the bottle gourd in small cubes. (If the bottle gourd is old then it is better to throw the seeds away)
  2. Peel and chop the potato in smaller sized cubes than the bottle gourd. This is because lauki /bottle gourd gets boiled quicker than potatoes.

  3. Wash, drain and keep aside. If the bottle gourd is not fresh then place the cubes in a cup of water for 4-5 minutes. It will soak water and freshen up.
  4. Smash the ginger in a pestle and mortar to make a paste. Keep aside.
  5. Beat the curd in a bowl, mix sugar along with cumin powder and garam masala. You can use roasted jeera powder in place of cumin powder.
  6. Soak the jeera rice for at least 20 min. Drain and keep aside.
  7. Take a non-stick Kadai/wok and heat the oil in high flame. Then turn the heat to medium flame and put the cumin seeds, 1 green chili, bay leaves and cinnamon sticks.
  8. When cumin seeds splutter pour the lauki and potato. Add salt.
  9. Stir continuously and cook for 3~4 minutes.
  10. Add jeera rice and stir again to mix well.
  11. Then add ginger paste, turmeric powder and Kashmiri red chili powder.
  12. Stir again and mix well. Sauté for 2~3 min.
  13. It will release lot of juice. Cook on low flame till oil starts to separate at the sides and the juices dried up.
  14. Now pour the curd mixture. Mix well.
  15. Again it will release a lot of water. Continue cooking and pour ½ cup water when the mixture again becomes dry.
  16. Cover and cook till the rice is boiled properly.
  17. Add Ghee and mix it well. This will enhance the aroma of the preparation. Sauté for one minute and switch off the burner.
  18. Now the dish is ready. The final dish should look moist but with no extra juice. Garnish with a green chili or as per your choice.

That’s all folks. Serve hot with white rice and enjoy your meal.

As a note always add less salt while cooking bottle gourd because finally this vegetable reduces a lot after cooking. 

As always please feel free to comment, criticize and seek if any help is required. I am all ears.